Sterilization Room Workflow: Why Autoclave Placement Matters for Compliance
How dental sterilization room layout and autoclave placement affect NSBDE and CDC compliance in Nevada dental practices, with a practical four-zone workflow.
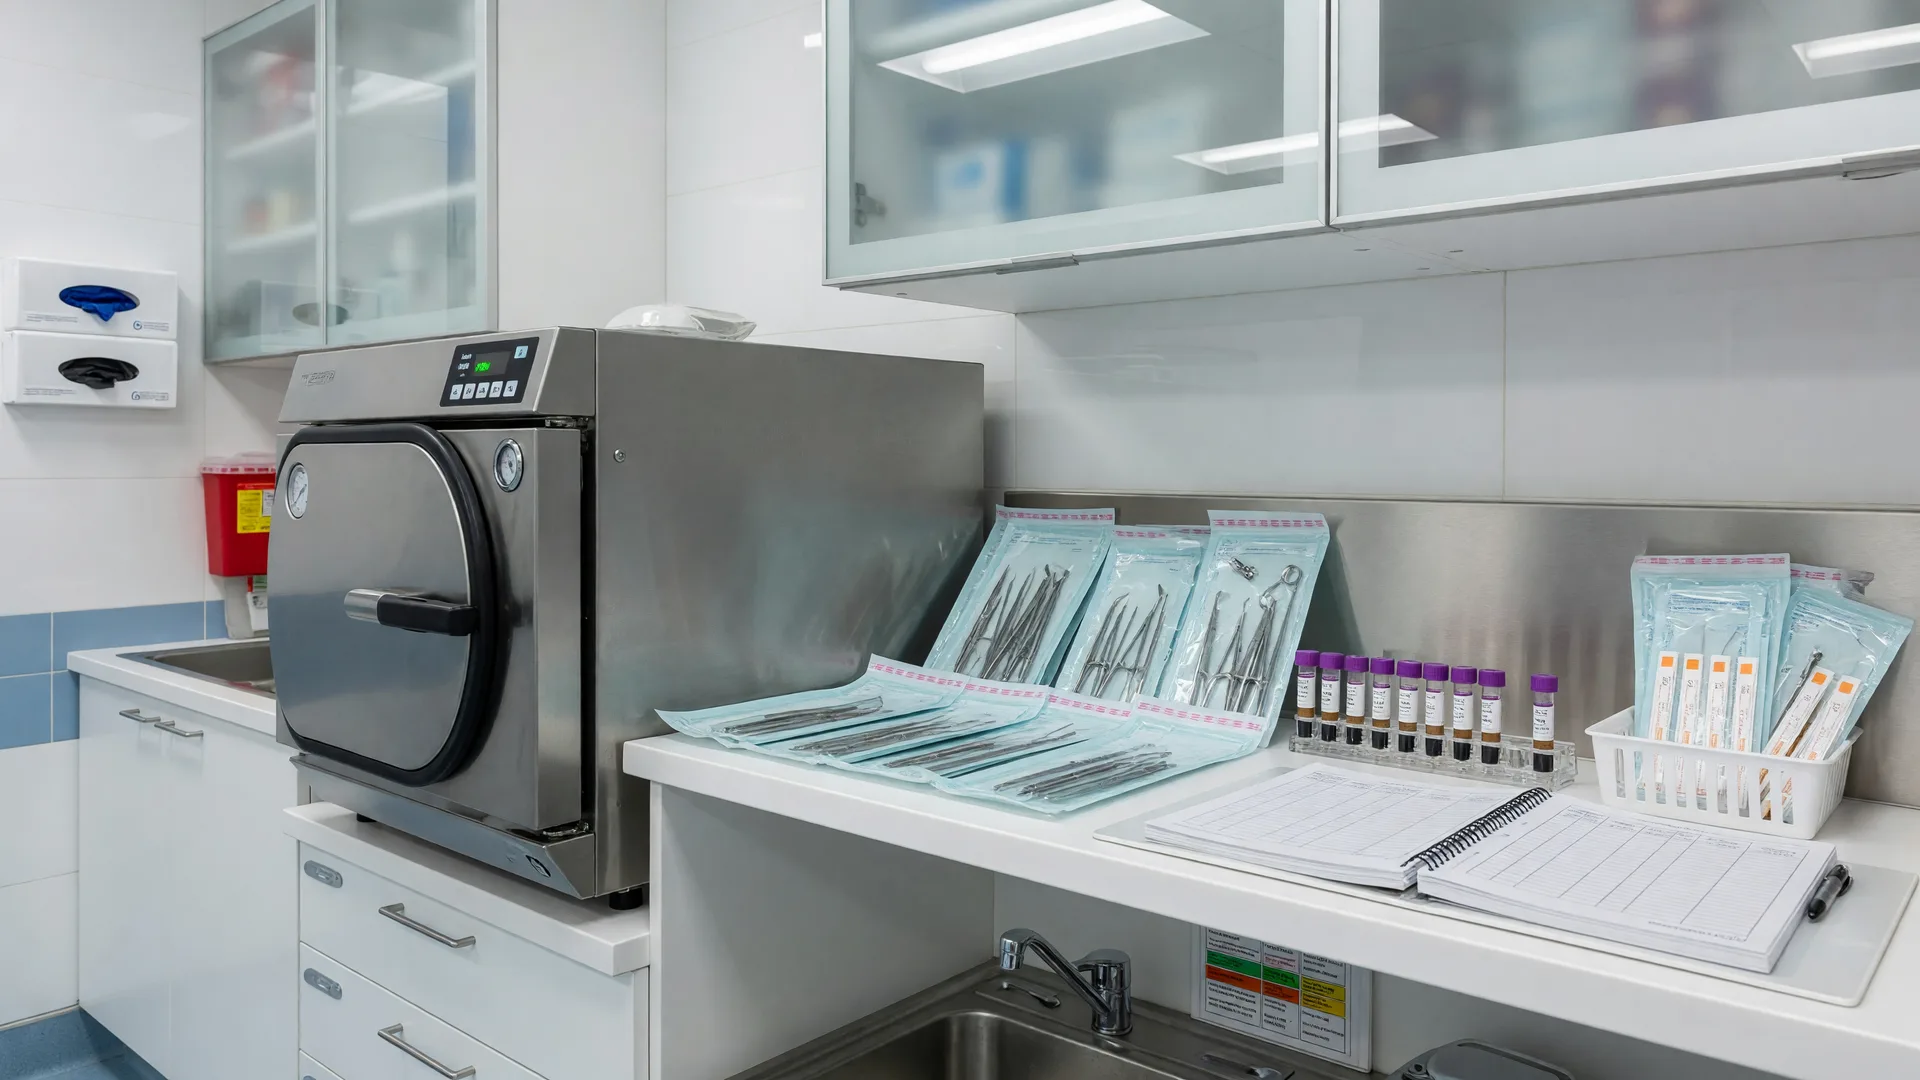
Autoclave placement is not just a matter of convenience. Where you put your sterilizer, and how your sterilization room flows from one zone to the next, determines whether your instruments come out truly sterile and whether your practice passes an infection control audit. In Nevada, the NSBDE inspects for compliance with the CDC Guidelines for Infection Control in Dental Health-Care Settings, adopted by reference under NAC 631.178, and those guidelines are explicit about one-directional workflow. If your autoclave sits in a spot that forces sterilized packs to cross back through a dirty zone, you have a compliance gap. I have walked into dozens of dental practices across southern Nevada where the sterilization room layout was the single biggest infection control issue. Here is how to fix it.
When I worked as an NSBDE infection control inspector, I saw offices in Summerlin, Henderson, the Southwest corridor, and beyond where well-intentioned teams had built a sterilization workflow around the available counter space instead of around the instrument path. An autoclave wedged between the hand-washing sink and a cabinet full of clean supplies looks efficient, but it creates a hidden problem: the instrument tray has to pass the contaminated cleaning area on its way to storage. That is a cross-contamination risk no spore test will catch. Let me walk you through the right way to organize your sterilization room, why it matters for both safety and compliance, and what the NSBDE actually checks on site.
What Does the CDC Recommend for Sterilization Room Workflow?
The CDC Guidelines for Infection Control in Dental Health-Care Settings recommend a designated central processing area (CPA) divided into four sequential zones. Instruments move in one direction only: from contaminated to clean to sterile. There should be no backtracking. Here is the standard layout:
Zone 1: Receiving, decontamination, and cleaning. This is where contaminated instruments arrive from treatment rooms. Instruments are sorted, rinsed, and cleaned using an ultrasonic cleaner or automated washer. This area must be physically separated from the clean zones to contain contamination. In many small practices, that separation is as simple as a pass-through window or a clearly demarcated counter section, but the separation has to be real.
Zone 2: Preparation and packaging. Cleaned instruments are inspected, assembled into trays, and wrapped or placed in container systems for sterilization. This area must be visibly clean, with no contaminated instruments crossing into it. I have seen offices where the cleaning and packaging zones are the same counter, separated by a few feet. That is a problem. If one side is wet and the other side has wrapped packs, the barrier between them has to be intentional, not imaginary.
Zone 3: Sterilization. This is where the autoclaves live. Instruments move directly from packaging into the sterilizer. The autoclave should be positioned so the sterilized load exits into the sterile storage zone, not back into the packaging or decontamination area. This is the placement point most practices get wrong. A front-loading autoclave that opens into the packaging area and then has its sterilized contents carried across the room to storage breaks the one-directional flow.
Zone 4: Sterile storage. Sterilized packs are stored in a clean, dry, enclosed area protected from dust, moisture, and contamination. Packs should not be stored near sinks, heating vents, or windows, and they should never sit on the floor. The CDC recommends storing wrapped packs in closed cabinets or drawers. If your sterile packs sit on an open shelf in the same room where instruments are being cleaned, that is a cross-contamination risk and an inspector will flag it.
For a complete breakdown of what the NSBDE looks for, read our guide on record-keeping for infection control. It covers every document category that matters during an inspection.
Why Does Autoclave Placement Affect Compliance Under Nevada Regulations?
NAC 631.178 adopts the CDC Guidelines for Infection Control in Dental Health-Care Settings by reference. That means the CDC recommendations carry the weight of regulation in Nevada. When the NSBDE conducts an infection control audit, the checklists reference the CDC's framework. Your practice does not need to meet a custom Nevada layout standard, but it does need to demonstrate compliance with the CDC's one-directional workflow principle.
The NSBDE Infection Control Committee audit form includes questions about written infection control policies, sterilization monitoring, and whether instruments are processed in a manner consistent with CDC guidelines. If an inspector walks into your sterilization room and sees a workstation where clean and contaminated instruments share the same counter space, or where sterilized packs must pass through the decontamination zone to reach storage, they will note it as a deficiency.
I have done these inspections myself. I know that when an inspector sees a layout problem, they ask about your written policies, your staff training documentation, and your sterilization monitoring records. A layout problem does not stand alone. It triggers a cascade of questions about the whole system. Our infection control consulting services include a full workflow audit of your sterilization room that covers exactly these points.
What Are the Most Common Sterilization Room Layout Mistakes?
Based on what I have seen across dozens of Nevada dental offices during my time as an NSBDE inspector, these are the five most frequent sterilization room layout problems:
1. The autoclave opens into the wrong zone. A front-loading autoclave that discharges sterilized packs into the same area where dirty instruments enter is the most common mistake. The solution is sometimes simple: rotate the autoclave 90 degrees or add a pass-through sterilizer that loads from the clean side and unloads into sterile storage. If a pass-through is not feasible, designate a dedicated clean counter on the autoclave's exit side and never let contaminated instruments cross it.
2. Clean and dirty surfaces are too close together. I have seen offices where the ultrasonic cleaner (for dirty instruments) sits 18 inches from the packaging station (for clean instruments). That is not separation. The CDC recommends physical separation, which can mean a splash guard, a partition, or a counter layout that puts the decontamination zone on one side of a barrier and the clean zone on the other. Even a clear plastic shield mounted on the counter helps. What does not help is a mental boundary that the team promises to respect but has no physical reminder of.
3. Sterile storage is exposed. Open shelving in a room where instrument cleaning happens leaves sterilized packs exposed to splash, aerosol, and dust. Sterile packs must be stored in closed cabinets or drawers. If your storage is open, the fix is straightforward: add doors or move storage to a separate cabinet.
4. No designated hand-washing sink in the zone. The decontamination area needs a dedicated hand-washing sink. Using a sink in the sterilization room that also serves clean activities creates another cross-contamination point. If you only have one sink, designate it as the dirty zone sink and provide a separate hand sanitizer station for the clean side, or better yet, add a second sink.
5. Instruments bypass the cleaning step. This is not strictly a layout issue, but I saw it often. Instruments go straight into the autoclave without a proper cleaning step, because the workflow encourages shortcuts. If the ultrasonic cleaner is around the corner or behind a door, the team finds ways to skip it. The layout should make the correct workflow the easiest path.
Can a Small Practice Achieve Proper Sterilization Room Flow?
Yes. I have seen one-operatory practices in Aliante and Mountain's Edge with kitchen-counter-sized sterilization stations that work perfectly because the team thought through the workflow. You do not need a 200-square-foot central processing area to comply with CDC guidelines. You need intentional separation between dirty and clean zones, a clear instrument path from decontamination to sterile storage, and the discipline to follow that path every time.
Here is a practical approach for a small practice: designate one side of your sterilization counter as the dirty side. Put your ultrasonic cleaner there. Place a physical divider at the midpoint. On the other side, set up your packaging station. Position your autoclave so the door opens toward the sterile storage cabinet. Mark your counters with colored tape or labels: red tape on the dirty side, green tape on the clean side. Train every team member on the rule. Instruments move from red to green, never the reverse.
That is not just good infection control. It is a defendable system. If an inspector asks how your practice prevents cross-contamination, you can point to the counter, the divider, and the colored tape, and show them that the workflow is intentional.
What Sterilization Monitoring Records Does the NSBDE Expect?
NAC 631.178 requires that dental practices comply with the CDC guidelines, which include mandatory sterilization monitoring. The NSBDE Infection Control Committee audit specifically checks for three levels of monitoring: mechanical (cycle time, temperature, pressure recorded for every load), chemical (indicator tapes or strips in every pack), and biological (weekly spore testing per sterilizer).
Your sterilization logs must be complete, current, and available. If an inspector asks for last week's spore test result and you cannot produce it, or if your log has a three-week gap, that is a demerit. I recommend keeping a dedicated sterilization log binder with pre-printed columns for date, load number, sterilizer used, cycle parameters, chemical indicator results, and biological indicator results. Sign and date every entry. For biological monitoring, retain the spore test results and the incubator reading sheets.
The NSBDE issues demerits for violations, not citations, but accumulated demerits put your license at risk. A missing spore test result is a demerit. A missing chemical indicator in a pack is a demerit. A sterilization log with unexplained gaps is a demerit. Over time, those add up.
If you want to walk through every item on the inspection checklist, download the 2026 Dental Practice Compliance Checklist. It covers sterilization monitoring, infection control documentation, and OSHA requirements side by side.
How Can a Consultant Help You Fix Sterilization Room Workflow?
Some practices can fix their sterilization room layout with a weekend reorganization and a trip to the supply store. Others need a fresh set of eyes to see the problems they have walked past every day for years. That is where a consultant helps. When I visit a practice for a workflow audit, I walk through the sterilization room, observe how instruments actually move through the space, and map out the real instrument path. I have found issues that the team did not notice because they had been working around them for so long: a cart in the hallway that blocks the clean route, a cabinet that forces the assistant to walk through the decontamination zone three times per load, a sterilizer placed so low that wrapped packs drag on the counter edge on the way in.
An outside audit catches those specific problems. It also gives you a written report with prioritized fixes that you can hand to an inspector as proof that you are actively managing your infection control system. Samantha Medeiros brings 16 years of clinical experience plus former NSBDE inspector training to every audit, and we serve dental practices across the Las Vegas Valley and throughout southern Nevada.
If you are not sure whether your sterilization room layout is compliant, start by walking through the four-zone workflow in your own practice. Stand at the point where dirty instruments enter and watch a full cycle of instrument processing. Do the instruments move in one direction without backtracking? Can you point to the physical separation between clean and dirty zones? If you cannot answer both questions with confidence, your sterilization room needs a second look. Fix it now, before an inspector walks through your door.
Need a Sterilization Room Workflow Audit?
Let a former NSBDE inspector review your sterilization room layout, instrument workflow, and monitoring records. We will identify gaps and give you a prioritized fix list.
Schedule Your Audit